So, apparently this is possible using the following procedure:
1. Back up your VM file in case you screw up [!!!!]
2. Boot into your Win10 VM as usual.
3. Check your Win10 virtual hard disk using the administrative tools to see:
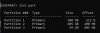
a. If there are no more than 3 partitions. If there are, see if you can whittle it down.
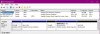
b. Check the properties to see if it's Master Boot Record (MBR) or GUID. If it's MBR you're legacy. If it's GUID, you're already UEFI and don't have to continue.
4. Do an advanced reboot into a command prompt:
a. While holding down Shift key: Start -> Power -> Restart
b. Select Troubleshoot, then Advanced options
c. Select Command Prompt
5. Log in with your account and Microsoft password (not your pin)
6. Using the command prompt:
a. Type: "mbr2gpt /validate" without quotes and hit return. This will check your hard disk.
b. If there's a problem, type: "mbr2gpt /validate /allowFullOS" without quotes and hit return.
c. If all is well, type "mbr2gpt /convert" without quotes and hit return. It will convert the MBR disk partition scheme to GUID.
d. If might give your some grief about WinRE or some other thing, but generally, if it says 'conversion was a success' you can just type "exit" and hit return to kill the command prompt and return to the advanced menu.
7. Choose "Turn off PC" to kill it. You don't want to restart Windows yet.
8. Find your VM file in the Finder, right click on it, and choose: "Show Package Contents".
9. Find the config.pvs and carefully open it in TextEdit:
a. Search for the section <Bios dyn_lists="">
b. Change <EfiEnabled> from "0" to "1"
c. Change <EfiSecureBoot> from "0" to "1"
d. Save the file back.
10. You should now be able to open the VM Confguration, go to the Hardware tab, click the "+" and add the TPM Chip. If not, restart Parallels first.
11. Run Win10 as you normally would. It might have an issue at first (mine did), but subsequent restarts seem to be ok.
12. You then should be able to run the PC Health Check, obtained from https://aka.ms/GetPCHealthCheckApp. Mine came back with a processor error, since it's an older Quad-core i7 (early 2013 MBP), but it's technically sufficient per Win11 required specs. All the other things checked out:
 The processor isn't currently supported for Windows 11 [Intel Core i7-3740QM CPU @ 2.7GHz]
 This PC supports Secure Boot
TPM 2.0 enabled on this PC [TPM 2.0]
There is at least 4 GB of system memory (RAM) [8 GB]
The system disk is 64 GB or larger [275 GB]
The processor has 2 or more cores [4]
The processor clock speed is 1 GHz or faster [2.7 GHz]
Not real worried about the first thing because this processor isn't listed as being supported for the current version of Win10 (21H1) on Microsoft's site, either.
1. Back up your VM file in case you screw up [!!!!]
2. Boot into your Win10 VM as usual.
3. Check your Win10 virtual hard disk using the administrative tools to see:
a. If there are no more than 3 partitions. If there are, see if you can whittle it down.
b. Check the properties to see if it's Master Boot Record (MBR) or GUID. If it's MBR you're legacy. If it's GUID, you're already UEFI and don't have to continue.
4. Do an advanced reboot into a command prompt:
a. While holding down Shift key: Start -> Power -> Restart
b. Select Troubleshoot, then Advanced options
c. Select Command Prompt
5. Log in with your account and Microsoft password (not your pin)
6. Using the command prompt:
a. Type: "mbr2gpt /validate" without quotes and hit return. This will check your hard disk.
b. If there's a problem, type: "mbr2gpt /validate /allowFullOS" without quotes and hit return.
c. If all is well, type "mbr2gpt /convert" without quotes and hit return. It will convert the MBR disk partition scheme to GUID.
d. If might give your some grief about WinRE or some other thing, but generally, if it says 'conversion was a success' you can just type "exit" and hit return to kill the command prompt and return to the advanced menu.
7. Choose "Turn off PC" to kill it. You don't want to restart Windows yet.
8. Find your VM file in the Finder, right click on it, and choose: "Show Package Contents".
9. Find the config.pvs and carefully open it in TextEdit:
a. Search for the section <Bios dyn_lists="">
b. Change <EfiEnabled> from "0" to "1"
c. Change <EfiSecureBoot> from "0" to "1"
d. Save the file back.
10. You should now be able to open the VM Confguration, go to the Hardware tab, click the "+" and add the TPM Chip. If not, restart Parallels first.
11. Run Win10 as you normally would. It might have an issue at first (mine did), but subsequent restarts seem to be ok.
12. You then should be able to run the PC Health Check, obtained from https://aka.ms/GetPCHealthCheckApp. Mine came back with a processor error, since it's an older Quad-core i7 (early 2013 MBP), but it's technically sufficient per Win11 required specs. All the other things checked out:
The processor isn't currently supported for Windows 11 [Intel Core i7-3740QM CPU @ 2.7GHz] This PC supports Secure Boot TPM 2.0 enabled on this PC [TPM 2.0] There is at least 4 GB of system memory (RAM) [8 GB] The system disk is 64 GB or larger [275 GB] The processor has 2 or more cores [4] The processor clock speed is 1 GHz or faster [2.7 GHz]Not real worried about the first thing because this processor isn't listed as being supported for the current version of Win10 (21H1) on Microsoft's site, either.