Possible to convert UTM VM to Parallels VM?

Hello,
Kindly provide us with more details, which VM (from which architecture, host OS) and also if possible, kindly provide us a newly created VM in UTM using a online-secure-file sharing link.
Thank you.
 
Hello. I'm also trying to do the same thing. I tried to follow the steps given here: https://kb.parallels.com/en/124491
However, those steps do not seem to work for opening and converting a UTM virtual machine. Is this doable? It seems like it should be. It's a Windows 11 ARM edition VM, and I have Parallels Desktop 19 for Mac, running on an M1 Max in a 2021 MacBook Pro. When I choose "File > Open" and browse to the UTM VM, it shows grayed out and cannot be clicked. I would sure welcome any advice on how to do this.
 
I have some updates, and still need some advice.

First, by using directions from here: https://www.digitalocean.com/community/tutorials/how-to-convert-virtual-machine-image-formats

...I was able to install QEMU on my Mac, and then use the following command line in Terminal...

qemu-img convert -f qcow2 DAC6E0DB-DB1C-4B7A-AB54-AE666AD44429.qcow2 -O vdi Win-11-Pro-ARM-64.vdi

...to convert from my existing UTM "drive" image (.qcow2 file - UTM image format) to a ".vdi" drive image file (default image format of VirtualBox). This was after right-clicking on the .utm file, selecting "View Contents", and locating the .qcow2 file inside, copying it, and pasting it outside the .utm file.

Once I had converted from .qcow2 to .vdi, the Parallels Desktop software was able to open that for conversion, with the File > Open command.

However, in trying to bring up the newly converted VM, I get stuck at a boot screen saying there is no OS installed in the VM.

What should I do? Link the .iso file to the new VM and run setup? If so, will it not overwrite my existing Windows installation?

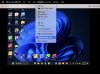
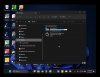
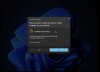
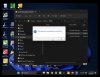
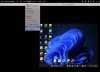
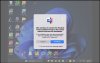
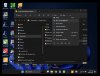
The attached screen shots show (as numbered):
01. Command line conversion in Terminal.
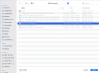
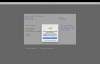
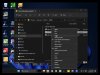
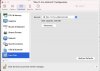
02. The Parallels Desktop software was able to open the resulting .vdi file for conversion (even though it was grayed out, it could be selected and opened):
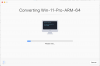
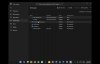
03. The conversion process looked fine, and seemed to complete:
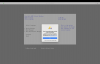
04. But then I got a cryptic boot screen and a warning that there was no OS installed.
05. Choosing "reset" (on above screen shot) starts a "converting" loop.
06. Same screen as before, but smaller.
07. No OS, same as before.
 

Attachments

  • 01. Screenshot 2023-10-07 at 4.07.37 PM.png
    01. Screenshot 2023-10-07 at 4.07.37 PM.png
    46 KB · Views: 29
  • 02. Opening vdi (default image format of VirtualBox) Screenshot 2023-10-07 at 4.06.24 PM.png
    02. Opening vdi (default image format of VirtualBox) Screenshot 2023-10-07 at 4.06.24 PM.png
    358.1 KB · Views: 26
  • 03. Converting Screenshot 2023-10-07 at 3.41.19 PM.png
    03. Converting Screenshot 2023-10-07 at 3.41.19 PM.png
    137.3 KB · Views: 26
  • 04. No OS Screenshot 2023-10-07 at 3.45.31 PM.png
    04. No OS Screenshot 2023-10-07 at 3.45.31 PM.png
    529.7 KB · Views: 25
  • 05. Choosing reset starts a "converting" loop Screenshot 2023-10-07 at 3.50.15 PM.png
    05. Choosing reset starts a "converting" loop Screenshot 2023-10-07 at 3.50.15 PM.png
    214.2 KB · Views: 24
  • 06. Same screen as before, but smaller. Screenshot 2023-10-07 at 3.51.59 PM.png
    06. Same screen as before, but smaller. Screenshot 2023-10-07 at 3.51.59 PM.png
    229.4 KB · Views: 23
  • 07. No OS, same as before. Screenshot 2023-10-07 at 3.52.13 PM.png
    07. No OS, same as before. Screenshot 2023-10-07 at 3.52.13 PM.png
    529.6 KB · Views: 21
More good news, but still need some help.

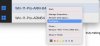
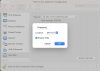
While it was still not starting, I noticed in Configuration area for the "converted" VM that both the main HDD and the CD drive were listed as "IDE" instead of "SATA." When I changed them to SATA, the VM will start!

However, it takes a long time to start, each time, with a white "configuration" dialog shown, then a fairly long time of black screen with nothing but a mouse, and finally the login screen.

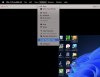
However, the crucial thing now is that I cannot get Parallels Tools to install. I have tried normal method, plus right-click and run as admin, plus copying files to the Windows main drive, and running as admin, and I tried doing a "Clean Boot" and run as admin. It will usually do the ask for permission to change the system, and I say yes, but nothing happens after that, no matter how long I wait.

I also browsed into the Virtio > Win 10 > ARM 64 folder, right-clicked on the "netkvm" file and chose "Install" and it said it installed. I then rebooted. It did not seem to make any difference that I could tell. Maybe faster boot? I need to check.

Perhaps you can tell me how to extract a log file for you to check, or some such.

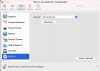
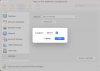
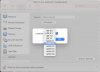
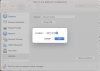
Below are screen shots. Their file names have some details in them on what the image is about:

(Note: additional screen shots in subsequent message as only 10 at a time are permitted.)

08. Checking config, setting main HDD from IDE to SATA.png
09. Checking config, setting main HDD from IDE to SATA.png
10. Checking config, setting main HDD from IDE to SATA.png
11. Boots, but no CD Drive yet, also needs set from IDE to SATA.png
12. Checking config, setting CD drive from IDE to SATA.png
13. Checking config, setting CD drive from IDE to SATA.png
14. Checking config, setting CD drive from IDE to SATA.png
15. Checking config, setting CD drive from IDE to SATA.png
16. Does boot now, and has CD drive, but still long black screen before login.png
17. Does boot now, and has CD drive.png
 

Attachments

  • 08. Checking config, setting main HDD from IDE to SATA.jpeg
    08. Checking config, setting main HDD from IDE to SATA.jpeg
    107.1 KB · Views: 14
  • 09. Checking config, setting main HDD from IDE to SATA.jpeg
    09. Checking config, setting main HDD from IDE to SATA.jpeg
    159.8 KB · Views: 11
  • 10. Checking config, setting main HDD from IDE to SATA.jpeg
    10. Checking config, setting main HDD from IDE to SATA.jpeg
    149 KB · Views: 11
  • 11. Boots, but no CD Drive yet, also needs set from IDE to SATA.jpeg
    11. Boots, but no CD Drive yet, also needs set from IDE to SATA.jpeg
    234.8 KB · Views: 9
  • 12. Checking config, setting CD drive from IDE to SATA.jpeg
    12. Checking config, setting CD drive from IDE to SATA.jpeg
    144.8 KB · Views: 9
  • 13. Checking config, setting CD drive from IDE to SATA.jpeg
    13. Checking config, setting CD drive from IDE to SATA.jpeg
    129.1 KB · Views: 8
  • 14. Checking config, setting CD drive from IDE to SATA.jpeg
    14. Checking config, setting CD drive from IDE to SATA.jpeg
    155.4 KB · Views: 9
  • 15. Checking config, setting CD drive from IDE to SATA.jpeg
    15. Checking config, setting CD drive from IDE to SATA.jpeg
    139.3 KB · Views: 8
  • 16. Does boot now, and has CD drive, but still long black screen before login.jpeg
    16. Does boot now, and has CD drive, but still long black screen before login.jpeg
    126 KB · Views: 9
  • 17. Does boot now, and has CD drive.jpeg
    17. Does boot now, and has CD drive.jpeg
    496.1 KB · Views: 8
(Note: additional screen shots in subsequent message as only 10 at a time are permitted.)

18. Try installing Parallels Tools. Fails.png
19. Try installing Parallels Tools. Fails.png
20. Try installing Parallels Tools. Fails.png
21. Clean Boot suggested.png
22. Clean Boot explained.png
23. Clean Boot (record of enabled items before I disabled them).png
24. right-clicked on "netkvm" and "Installed." Said success, but did not help.png
25. right-clicked on "netkvm" and "Installed." Said success, but did not help.png
26. Try installing Parallels Tools. Fails.png
27. Try installing Parallels Tools. Fails.png
 

Attachments

  • 18. Try installing Parallels Tools. Fails.jpeg
    18. Try installing Parallels Tools. Fails.jpeg
    391.8 KB · Views: 6
  • 19. Try installing Parallels Tools. Fails.jpeg
    19. Try installing Parallels Tools. Fails.jpeg
    261.8 KB · Views: 5
  • 20. Try installing Parallels Tools. Fails.jpeg
    20. Try installing Parallels Tools. Fails.jpeg
    146.3 KB · Views: 5
  • 21. Clean Boot suggested.jpeg
    21. Clean Boot suggested.jpeg
    612.8 KB · Views: 5
  • 22. Clean Boot explained.jpeg
    22. Clean Boot explained.jpeg
    582.2 KB · Views: 4
  • 23. Clean Boot (record of enabled items before I disabled them).jpeg
    23. Clean Boot (record of enabled items before I disabled them).jpeg
    366.7 KB · Views: 4
  • 24. right-clicked on "netkvm" and "Installed." Said success, but did not help.jpeg
    24. right-clicked on "netkvm" and "Installed." Said success, but did not help.jpeg
    283.3 KB · Views: 4
  • 25. right-clicked on "netkvm" and "Installed." Said success, but did not help.jpeg
    25. right-clicked on "netkvm" and "Installed." Said success, but did not help.jpeg
    281.1 KB · Views: 4
  • 26. Try installing Parallels Tools. Fails.jpeg
    26. Try installing Parallels Tools. Fails.jpeg
    469.6 KB · Views: 5
  • 27. Try installing Parallels Tools. Fails.jpeg
    27. Try installing Parallels Tools. Fails.jpeg
    275 KB · Views: 4
(Note: additional screen shots in subsequent message as only 10 at a time are permitted.)

28. Try installing Parallels Tools. Fails.png
29. Try installing Parallels Tools. Fails.png
 

Attachments

  • 28. Try installing Parallels Tools. Fails.jpeg
    28. Try installing Parallels Tools. Fails.jpeg
    290.1 KB · Views: 4
  • 29. Try installing Parallels Tools. Fails.jpeg
    29. Try installing Parallels Tools. Fails.jpeg
    150.6 KB · Views: 4
SUCCESS!
After much effort by yours truly had still not quite figured out the last step, getting Parallels Tools installed, I waved the white flag and requested help from Parallels.com tech support. A fantastic agent Nabiil G. came in with a remote screen control session, and after a bunch of steps in various methods, he eventually honed in on Micro$oft's Bitlocker, which I think is also referred to as TPM, and suspected it was preventing the Parallels Tools installer from running. He found a way to turn off Bitlocker, and got Parallels Tools installed on the VM, and it's now up and running flawlessly. Thank you, Nabiil!

The following was his "post mortem" summary of what all was done!

Hello,
Thank you for your time and patience.
Kindly find the summary of our remote session below:

1. Create a new Virtual Machine as a test
2. Boot your old hard disk virtual machine in the test Virtual Machine.
3. Install Parallels Tools on the new machine.
4. Once the installation has been completed, we did open the old virtual machine and the Parallels Tools was installed successfully on the old machine.
5. Test the applications which was installed on the old virtual machine.
6. Everything is now working properly.

Since your issue has been resolved, we are now proceeding to the ticket closure.
We are very glad to assist you in resolving the issue you encountered.
Please do not hesitate to contact us if you have any question or issue.
Have a nice week and enjoy using Parallels Desktop!
Best regards,
Nabiil G.​
 
Hi all!

At this time the best approach that I found, was
1.- Download parrotOs for qcow2 version (find it on the repositories from Parrot like alibaba for best bandwidth , etc)
2.- Convert the image to VHDX
3.- Import to parallels
4.- Install Parallels Tools
 
Back
Top