
Install the app
How to install the app on iOS
Follow along with the video below to see how to install our site as a web app on your home screen.
Note: This feature may not be available in some browsers.
You are using an out of date browser. It may not display this or other websites correctly.
You should upgrade or use an alternative browser.
You should upgrade or use an alternative browser.
Can't Reserve Win10 - Parallels Display Driver Critical Issue
- Thread starter MichaelS4
- Start date
Best answer

Guys, please check some info about the issue here.
Also I'd like to let you know that we're working on the resolution with our Development.
While we do not have ETA for the fix, it has been prioritized appropriately.
Also I'd like to let you know that we're working on the resolution with our Development.
While we do not have ETA for the fix, it has been prioritized appropriately.
I successfully installed Windows 10 in my Parallels 9 VM, including Parallels Tools. All this was done via legitimate means:
1) Make sure you've previously managed to reserve an upgrade.
2) Uninstall Parallels Tools from your Windows 7/8/8.1 VM.
3) On your Mac, visit the Microsoft Windows 10 ISO download page and download the edition for you.
4) Once downloaded, mount the ISO in your Windows VM using the standard means (Devices > CD/DVD > Connect Image in Parallels 9).
5) Launch setup from the mounted image and follow the instructions to upgrade to Windows 10. DO NOT PERFORM A CLEAN INSTALLATION OTHERWISE YOU'LL LOSE YOUR FREE UPGRADE.
6) Windows will upgrade itself to Windows 10.
7) Follow through the setup steps at the end. Once you're back to the desktop, you should find Windows 10 is activated.
8) Follow the "Scenario 2: More Complicated" steps on the Parallels Tools manual installation to get Parallels Tools reinstalled.
Note that on Parallels 9 at least, shared folders (\\psf in Windows) doesn't appear to work. Coherence is a bit janky too. Everything else works fine.
I see you referenced Parallels 9. I am running Parallels 10. Will this work?
I managed to get Windows 10 installed using these steps but all three scenarios failed to mount the Parallel Tools Drive under Parallels 9. I had no option other than to upgrade to Parallels 10 (I know 11 is coming) and then I could install Parallels Tools. Windows 10 working fine on my 2012 Retina MBP. Step 3 is also incorrect. Download the ISO from within your Windows VM - you then have the option to Upgrade so no re-entering the licence key needed. Happy installing and good luck. The whole process took just over an hour and a half (over a 12mbp connection)I successfully installed Windows 10 in my Parallels 9 VM, including Parallels Tools. All this was done via legitimate means:
1) Make sure you've previously managed to reserve an upgrade.
2) Uninstall Parallels Tools from your Windows 7/8/8.1 VM.
3) On your Mac, visit the Microsoft Windows 10 ISO download page and download the edition for you.
4) Once downloaded, mount the ISO in your Windows VM using the standard means (Devices > CD/DVD > Connect Image in Parallels 9).
5) Launch setup from the mounted image and follow the instructions to upgrade to Windows 10. DO NOT PERFORM A CLEAN INSTALLATION OTHERWISE YOU'LL LOSE YOUR FREE UPGRADE.
6) Windows will upgrade itself to Windows 10.
7) Follow through the setup steps at the end. Once you're back to the desktop, you should find Windows 10 is activated.
8) Follow the "Scenario 2: More Complicated" steps on the Parallels Tools manual installation to get Parallels Tools reinstalled.
Note that on Parallels 9 at least, shared folders (\\psf in Windows) doesn't appear to work. Coherence is a bit janky too. Everything else works fine.
PS big thanks to DanielK4 for posting this solution. Much Respect

ParallelsU9
Bit poster
I was running Parallels 10.2.2, Windows 8.1 Pro. As others, but upgrade failed the compatibility test.
Downloading the ISO upgrading via that worked great for me. Installed Parallels tools afterwards and things seem to have gone well.
Edit: for Parallels 10, my \psf shared folders work ok.
Downloading the ISO upgrading via that worked great for me. Installed Parallels tools afterwards and things seem to have gone well.
Edit: for Parallels 10, my \psf shared folders work ok.
Last edited:
PD already said on social media, no news about P11 yet.When will you fix this? When is Parallels 11 out?
I had a reservation confirmed. On release day, I got the message saying the display driver wasn't compatible. I uninstalled Parallels Tools and rebooted. Downloaded the ISO file as mentioned above (64 bit version). Mounted ISO and ran the installer. Windows installed just fine. Then reinstalled Parallels Tools using the Menu within Parallels. Everything is working just fine.
2013 MacBook Pro running OS 10.10.4 and Parallels 10.2.2
2013 MacBook Pro running OS 10.10.4 and Parallels 10.2.2
Darren_Coleman
Junior Member
Does your DVD drive work? Mine doesn't even show in Windows 10, it only shows in Device Manager as a "Virtual DVD" device.I successfully installed Windows 10 in my Parallels 9 VM, including Parallels Tools. All this was done via legitimate means:
1) Make sure you've previously managed to reserve an upgrade.
2) Uninstall Parallels Tools from your Windows 7/8/8.1 VM.
3) On your Mac, visit the Microsoft Windows 10 ISO download page and download the edition for you.
4) Once downloaded, mount the ISO in your Windows VM using the standard means (Devices > CD/DVD > Connect Image in Parallels 9).
5) Launch setup from the mounted image and follow the instructions to upgrade to Windows 10. DO NOT PERFORM A CLEAN INSTALLATION OTHERWISE YOU'LL LOSE YOUR FREE UPGRADE.
6) Windows will upgrade itself to Windows 10.
7) Follow through the setup steps at the end. Once you're back to the desktop, you should find Windows 10 is activated.
8) Follow the "Scenario 2: More Complicated" steps on the Parallels Tools manual installation to get Parallels Tools reinstalled.
Note that on Parallels 9 at least, shared folders (\\psf in Windows) doesn't appear to work. Coherence is a bit janky too. Everything else works fine.
EDIT: Seemed to cure it by changing the location to an IDE device instead of a SATA device in the VM configuration.
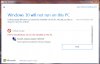
Just received the same message when trying to upgrade to the reserved Win10 version.I just attempted to reserve Windows 10 and the app is saying that the Parallels Display Driver (WDDM) is a critically conflicting piece of equipment. Any ideas on how to make this message go away so I can reserve?
View attachment 9908
This was posted six weeks ago. Any update? Release day is today and WDDM errors seem to be the norm.Hey, I would like to let you know that we have already involved our Development in this case and they are currently working on the resolution.
Once we receive any update we will let you know.
mastercraft
Junior Member
If you look at the Parallels twitter account they're replying with the same answer to everyone who asks about this.
Our devs are actively working on it and we'll update this article as soon as we have news. http://kb.parallels.com/122884
Our devs are actively working on it and we'll update this article as soon as we have news. http://kb.parallels.com/122884
Sounds anoying i have to admit , but coming quick with a crap solution makes the case worser than it already is.If you look at the Parallels twitter account they're replying with the same answer to everyone who asks about this.
Our devs are actively working on it and we'll update this article as soon as we have news. http://kb.parallels.com/122884
I am running the current version of Parallels 10 and got the same compatibility message. I decided to ignore the reservation system and download an iso copy of Windows 10 from the Microsoft web site.After I downloaded Windows 10 and copied it to a DVD, I uninstalled Parallels tools but then my Windows 8.1 would not recognize my DVD. I reinstalled the Parallels tools and then successfully read the DVD and installed the upgrade to Windows 10. I have not checked out all functionality and full compatibility with Parallels 10 but I do have a working Windows 10 under Parallels 10
mastercraft
Junior Member
I absolutely agree which is why I have not attempted the aforementioned methods. I don't doubt that these methods work but I can wait for a solution from Parallels.Sounds anoying i have to admit , but coming quick with a crap solution makes the case worser than it already is.
Billst...I'm tempted to follow your lead here; just exactly how did you
initiate the upgrade process to begin the upgrade? Simply double click
the Win iso image from within the 8.1 VM? I, too, have a legit Win 8.1
install but NO reservation..so how does one begin the upgrade process?
I don't want to damage my Win 8.1 install with guesswork here..also appears
that in your case the Parallels tools made no difference as you re-installed them PRIOR
to the upgrade process..
initiate the upgrade process to begin the upgrade? Simply double click
the Win iso image from within the 8.1 VM? I, too, have a legit Win 8.1
install but NO reservation..so how does one begin the upgrade process?
I don't want to damage my Win 8.1 install with guesswork here..also appears
that in your case the Parallels tools made no difference as you re-installed them PRIOR
to the upgrade process..
FIX HERE !!!! vvvvv
All you need to do is to download the iso from this link (4GB file but I gather this is what you would have got if everything had gone well with the reservation anyway !)
https://www.microsoft.com/en-us/software-download/windows10ISO
You will be asked questions about which language and if you want 64 or 32 bit first.
Attach the .ISO file using the CD icon on the menu bar of your virtual machine. Windows will ask what you want to do with the new disk - just click the option to run setup.exe and you are back on track. Parallels certainly works with windows 10 (have no fear I have done the upgrade and it works fine - just an automatic re-install of parallels tools is needed on first boot up). It takes a while to run and probably best to let it download the updates as well.
One last thing - it is good idea to back up your virtual machine first (or snapshot) just to make sure.
All you need to do is to download the iso from this link (4GB file but I gather this is what you would have got if everything had gone well with the reservation anyway !)
https://www.microsoft.com/en-us/software-download/windows10ISO
You will be asked questions about which language and if you want 64 or 32 bit first.
Attach the .ISO file using the CD icon on the menu bar of your virtual machine. Windows will ask what you want to do with the new disk - just click the option to run setup.exe and you are back on track. Parallels certainly works with windows 10 (have no fear I have done the upgrade and it works fine - just an automatic re-install of parallels tools is needed on first boot up). It takes a while to run and probably best to let it download the updates as well.
One last thing - it is good idea to back up your virtual machine first (or snapshot) just to make sure.